Every client who books through your page gets a record automatically created. You can also add clients manually.
Viewing clients
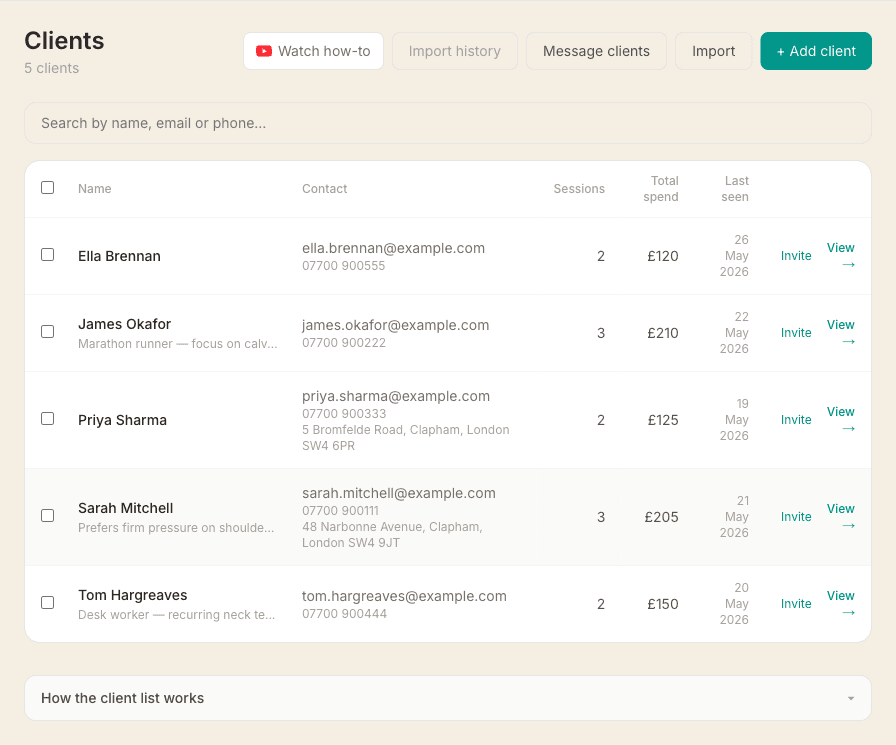
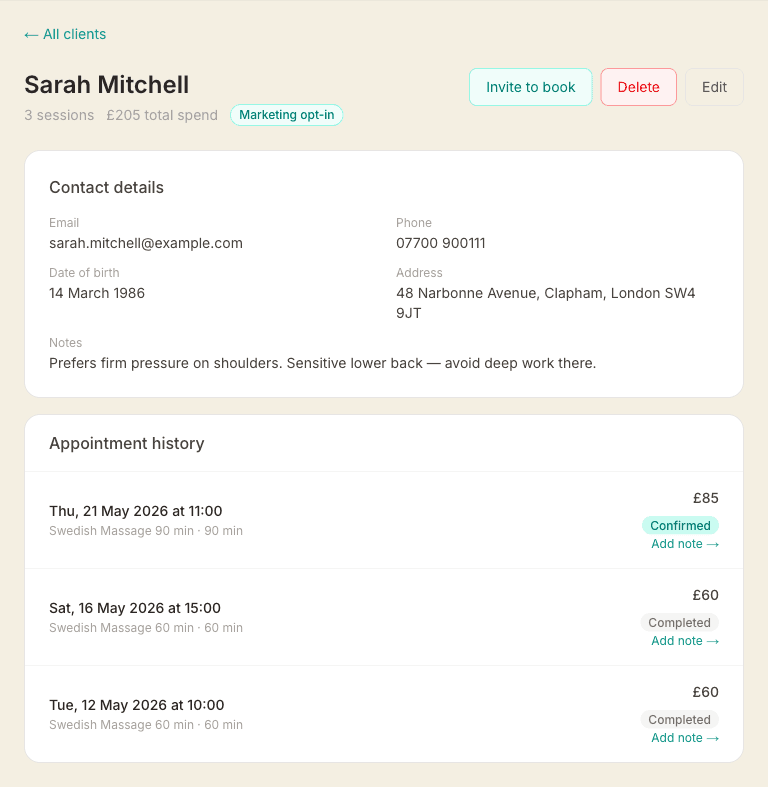
Go to Clients to see your full client list. Click any client to open their record, which shows their contact details, appointment history, and notes.
Sorting and filtering the list
The Sort dropdown above the list reorders it: by name, by surname, by who you saw most recently or longest ago, by who was added most recently, by next appointment, by total spend, or by number of sessions. Clients with nothing to sort on, like someone you have not seen yet, always go to the bottom rather than the top.
Tap Filters to open the panel underneath. One visit only is everyone who has been to you exactly once so far, which is usually the most valuable list on the page, and No future booking is everyone with nothing in the diary. Lapsed 6m+, Never booked, Not invited to portal and Can be messaged work the same way, and a filter that would give you nobody is not shown at all. One activity filter applies at a time, and each chip shows how many clients it will give you. You can pair any one of them with a label chip, so VIP plus No future booking gives you the VIPs with nothing booked.
A row of colour-coded label chips appears above those, but only once you have labelled at least one client, so you can jump straight to your VIPs or to everyone still unlabelled. Your sort and filter are stored in the page address, so they survive a refresh and are still set when you come back from a client's record. Your sort is also remembered on that device, so the list opens in the same order next time.
Ticking the box on a row selects that client. Invite, Delete and the Marketing on / Marketing off buttons only ever act on the clients you can currently see, so a filter can never hide someone from an action you are about to take. If you have selections sitting behind a filter, the bar tells you how many.
Changing who gets marketing emails
Marketing opt-in decides who is included in Message clients and in the automatic retention emails. It is set when a client books or when they change it themselves in their client portal — and you can now change it too, either on a single client's record or for a whole selection at once.
On a client's record, the Marketing emails switch turns it on or off and saves straight away. On the client list, tick the clients you want, then use Marketing on or Marketing off in the blue bar. Turning marketing on for a batch asks you to confirm first.
This is the fix for a very common migration problem: if you brought your clients across from another system where they had already agreed to marketing, that consent may not have survived the import. Select them and switch it back on in one go.
One important caveat. Under UK GDPR, consent to receive marketing has to come from the client, not from you. Only turn this on for clients who have genuinely already agreed to hear from you — consent they gave you in a previous system carries over, but ticking the box for someone who never agreed does not make it consent. Every marketing email MassageHub sends carries an unsubscribe link, and a client who unsubscribes is switched off automatically.
How total spend is worked out
Total spend adds up a client's completed and upcoming appointments, less anything they took off with a discount code or a gift card. Sessions paid for through a membership or a treatment package are not counted again here, because that money was already taken when they bought the membership or package. The same figure is used on the client list and on the client's own record, so the two always agree.
Client records include
- Name, email, phone number
- Date of birth and address (if provided)
- Marketing opt-in (controls who shows up in Message clients bulk emails) — editable from the record or in bulk from the client list
- A Do not book flag with an optional reason — populated automatically when importing blocked clients from Fresha, shown as a red badge on the record
- All past and upcoming appointments
- SOAP notes from sessions
- Intake form submissions
- Documents you've attached — referral letters, scan reports, consent forms, photos (Pro plan)
Attaching documents
Every client record has a Documents section for files that belong with that client — a GP referral letter, a scan report, a signed paper consent form, a photo of a handwritten intake sheet. Tap + Add document, choose the file, and it appears in the list straight away. Attaching documents is part of the Pro plan.
You can attach PDFs, Word documents (.doc and .docx), plain text files, and JPEG or PNG photos, up to 20 MB each. Photos are resized automatically before they upload, so a full-resolution phone snap doesn't eat your allowance. Pro includes 1 GB of document storage and Plus includes 5 GB — the line under the heading shows what you've used, and turns amber as you get close.
Documents are yours alone. They're never shown to the client, never attached to an email, and never appear anywhere on your booking page. View opens a file in a new tab through a link that stops working after ten minutes, so a web address copied out of the bar isn't a lasting way in.
Why a downloaded file has an odd name
Save a document to your computer and it arrives named something like a3f27c81-….pdf, not the name you uploaded. That's deliberate, and worth knowing so it doesn't look like a fault.
A filename is often personal information in its own right — Sarah Jones — MRI report.pdf tells anyone who sees it something private about your client. Sending the real name with the download would also put it in the web address, in your browser history, and in the logs of every network the file travels through. So the file itself travels under its ID, while the real name stays here in your records, encrypted. The Documents list always shows the proper name, and you can rename the file once you've saved it.
The same is true of the JSON file you get from Download your data in Settings, Account. Each document there comes with a download link that works for one hour and needs no login, so treat that file as confidential and export again if you need the links working later. The real filename is in the file_name field alongside each link.
Deleting a document
Delete removes the file itself, not just its entry in the list. There's no recycle bin and it can't be undone, so you're asked to confirm first. Deleting a client removes all of their documents with them, and so does closing your account. If a file can't be removed for any reason you'll be asked to try again and the entry stays put — better that than the record quietly disappearing while the file lives on somewhere you can no longer reach it.
Labels
You can give a client a label — VIP, Regular, Friend or Staff — from their record. A label is mostly a marker for your own use, shown as a coloured badge in your client list, and you can optionally attach a standing discount to it.
That discount belongs to the label. Setting the label back to None clears the discount with it, so a client whose badge you remove goes back to your normal prices.
One label does more than mark: VIP is who your private hours apply to. If you set private hours on your Availability page, clients labelled VIP see those extra times when they're signed in, and nobody else does.
There's a separate switch for whether the client sees their own label. Turning it off keeps the badge private to you, and it doesn't affect private hours either way.
Editing client details
Click the edit button on a client record to update their details. Phone number is the primary identifier used to match returning clients — changing it will affect how future bookings link to the record.
When a client's email is bouncing
If an email to a client can't be delivered, or they mark one as spam, that client gets a red Bounced badge, both in your Clients list and on their record. A badge reading Bounced · spam means they reported the email as spam rather than the address being wrong. You'll also get an email letting you know, and a note appears on your dashboard showing how many clients are affected.
A bouncing address matters because that client won't receive anything you send them, including booking confirmations and reminders. Most of the time it's a simple typo. Open the client, correct their email address, and save, and the badge clears straight away. You can dismiss the dashboard note once you've had a look, and it only comes back if a new address starts bouncing.
Adding clients manually
Click Add client in the top right of the Clients page to create a record manually.
Bulk actions
Tick the checkboxes next to clients on the list to select multiple at once. A bar appears at the top with two actions:
- Invite to book — emails every selected client who has an email and hasn't already been invited, asking them to sign in and book
- Delete selected — removes the selected client records (two-click confirm to avoid accidents). This can't be undone, so be careful