The Appointments page shows all your upcoming and past sessions. You can view them as a list or a calendar.
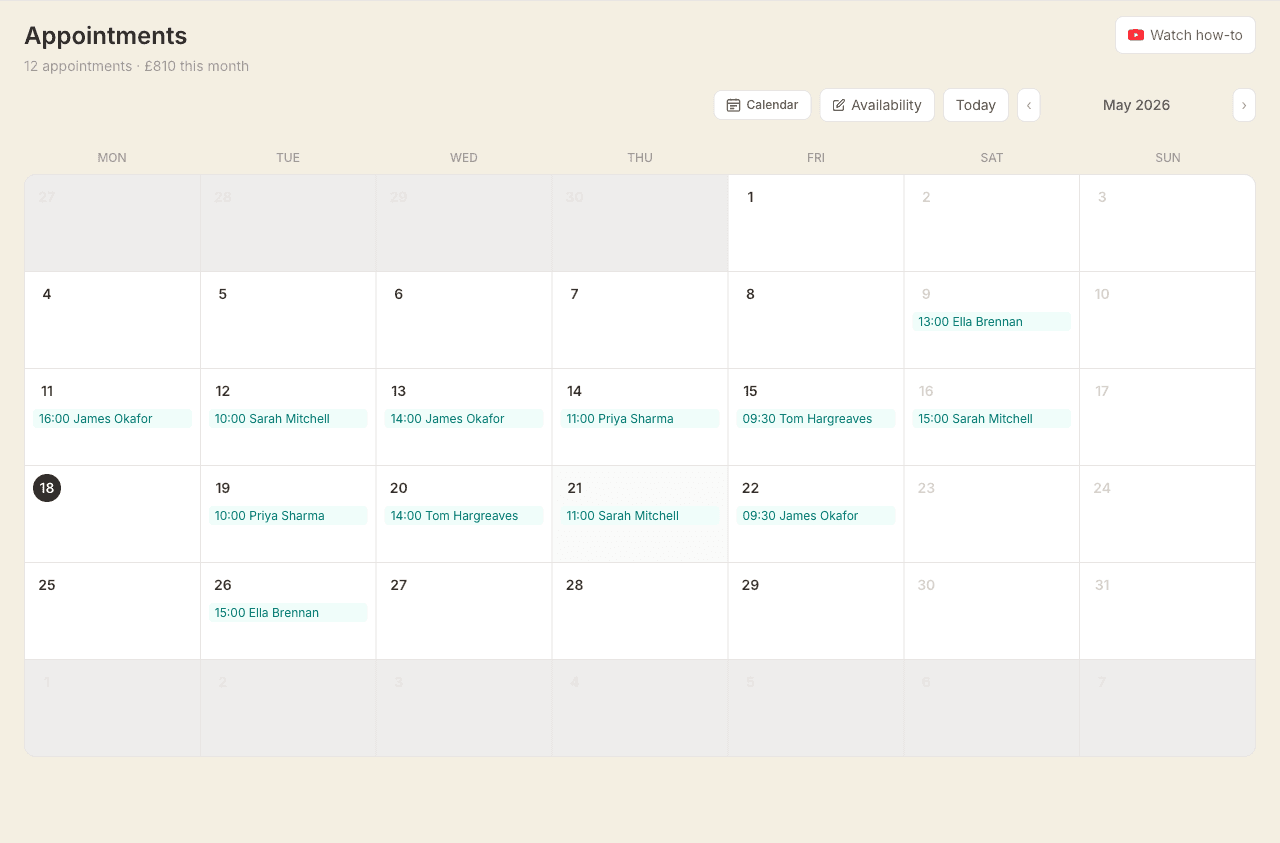
Finding your way around
The title, this week's session count and revenue all sit on a single row at the top of the page. When you have pending booking requests waiting, an amber requests pending chip appears in the same row — tap it to jump straight to the earliest one.
The ? button to the right of the title opens a short help panel for this page, with a 60-second walkthrough video at the top. Below that, the toolbar holds Today, Availability, the Week/Month switcher and the date arrows. On the current day, the column is highlighted and an amber line marks the current time.
Appointment statuses
- Confirmed — booked and upcoming
- Completed — session has happened
- No-show — client didn't attend
- Cancelled — cancelled by client or therapist
Marking appointments
Click the status dropdown on any appointment to change it. Mark sessions as completed after they happen, or no-show if the client didn't attend.
Cancelling an appointment
Mark the appointment as cancelled from the dashboard. The client receives a cancellation confirmation by email and SMS, with a link to rebook.
Clients can also cancel themselves from the link in their confirmation email. You'll be notified when they do.
Adding an appointment manually
Switch to the calendar view and click on any empty slot (or click-and-drag a time range) to open the new event panel. Choose Appointment, fill in the client and service, then save. The end time and price are set automatically based on the service duration. You can optionally send a confirmation email to the client.
If you have add-ons set up, a checkbox list appears below the service selector. Ticking an add-on adjusts the end time and price automatically. Add-ons with no duration (e.g. lavender oil) only affect the price.
Rescheduling by dragging
In week view (or the 1 and 3 day views on a phone), you can drag a confirmed appointment to a new time, or to a different day. On a computer, click and hold the appointment, drag it where you want, and let go. On a phone, press and hold for a moment until it lifts, then drag it.
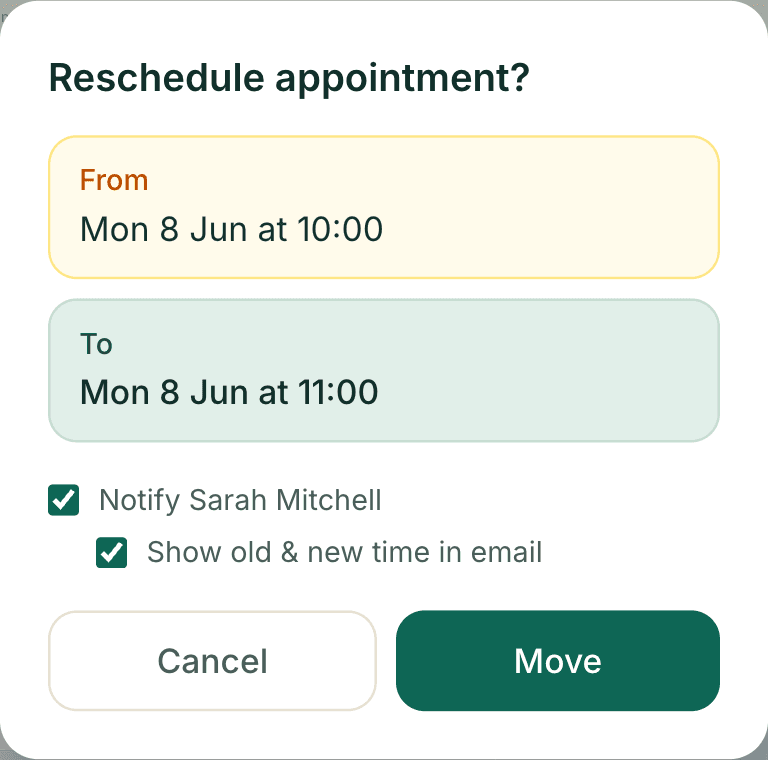
As you drag, the day it will land on is highlighted and a label at the top of the calendar shows the new date and time, so you can see exactly where it's going even when your finger is over it. To move a booking into another week, drag it to the left or right edge and the calendar turns to the next or previous week, pausing for a second so you can settle on the right day before you drop.
When you let go, a short confirmation shows the old and new time and lets you notify the client by email. If the new slot overlaps another booking or falls outside your usual working hours, you can still move it, with a gentle warning first so nothing slips through by accident. Only confirmed appointments can be dragged.
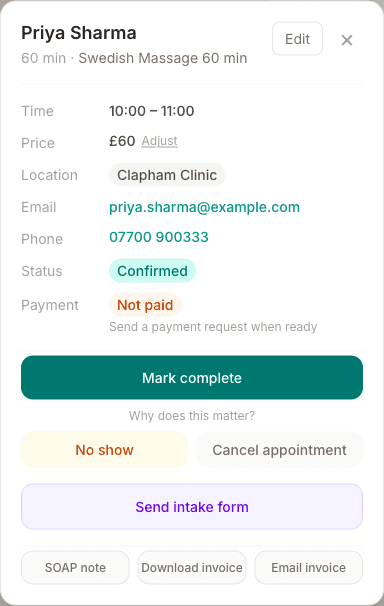
Calling or messaging a client
Tap an appointment to open the detail panel. If the client has a phone number on file, tap it to reveal Call, Text, and WhatsApp buttons — each opens the relevant app directly. WhatsApp is only shown for UK mobile numbers.
Marking time off
To mark time as unavailable without creating an appointment — for admin, travel, or a break — click a slot in the calendar view and choose Time off. See Marking time off on your calendar for more detail.
SOAP notes
Click SOAP notes on any appointment to open the notes editor. See Writing SOAP notes for more detail.